Questions? 800-523-5874 | [email protected]
- TEM Grids
- Prepmaster™ Specimen Preparation Robot
- TEM Window Grids
- Omniprobe Nanomanipulation Systems
- K-kit Wet "Liquid" TEM Kit
- Specimen Mounts
- SEM Specimen Holders
- Index and Finder SEM Grids
- SEM for Forensics
- SEM Sample Preparation Station Materials
- Cryogenic Personal Protection Equipment
- Cryo Dewars & Flasks
- Cryo-EM Grids & Grid Storage
- Cryogenic Vials & Racks
- Cryo-EM Vitrification Supplies
- Prepmaster™ Specimen Preparation Robot
- Laboratory Microwave Ovens
- LYNX II Automated Tissue Processor
- EMS Poly III
- Microtomes
- Tissue Slicers
- Heaters & Chillers
- SEM Cooling Stage
- Glow Discharge Systems
- Sputter Coaters & Carbon Coaters
- Stages
- Freeze Dryers
- Critical Point Dryers
- Cryo-SEM Preparation System
- Specimen Transfer Systems
- Decontaminators
- Desiccators
- Centrifuges
- Dry Baths
- Stirrers, Hot Plates
- Vortexers & Magnetic Mixers
- Rotators & Rockers
- Ovens & Incubators
- Vibration Isolation
- Air Sampling
- Vacuum Pumps
EMS Technical Data Sheets

ProScope EDU 1080P HDMI Microscope Quick Start Guide
EMS Catalog #68350-HDMI
Microscope Preparation
Insert the provided 8GB micro SD card into the microscope's micro SD card slot*. The SD card must be installed in order to capture and store images when in HDMI operation mode.
HDMI Operation
- Plug the provided HDMI cable into the microscope and then into a TV/monitor with an available HDMI input port.
- Plug the provided USB cable into the microscope's USB port then into the supplied power adaptor.
- Plug the power adapter into an AC wall outlet. Alternatively, if the TV/monitor has a powered 5V USB port, it can be powered in this way instead of using the power adapter.
- Turn on the TV/monitor and select the microscope's HDMI input as the video source to be displayed.
- Capture images and display menu/mode choices from the buttons found on the side of the microscope.
USB Operation
- For Windows: Install MicroCapture HD from the supplied CD.
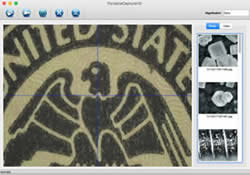
For Mac: Install PortableCapture HD from the supplied CD. - Plug the supplied USB cable into the microscope and then into a USB port on your computer.
- For USB microscope operation, first eject the SD card from the microscope before plugging it into the USB port of your computer, then launch the MicroCapture HD (Windows) or PortableCapture HD (Mac) application and begin using.
 * While the micro SD card is installed in the microscope, the microscope operates as a USB card reader for transferring images directly to your computer and does not operate as a USB microscope when in this state. Please eject the micro SD card before using as a USB microscope.