Questions? 800-523-5874 | [email protected]
- TEM Grids
- Prepmaster™ Specimen Preparation Robot
- TEM Window Grids
- Omniprobe Nanomanipulation Systems
- K-kit Wet "Liquid" TEM Kit
- Specimen Mounts
- SEM Specimen Holders
- Index and Finder SEM Grids
- SEM for Forensics
- SEM Sample Preparation Station Materials
- Cryogenic Personal Protection Equipment
- Cryo Dewars & Flasks
- Cryo-EM Grids & Grid Storage
- Cryogenic Vials & Racks
- Cryo-EM Vitrification Supplies
- Prepmaster™ Specimen Preparation Robot
- Laboratory Microwave Ovens
- LYNX II Automated Tissue Processor
- EMS Poly III
- Microtomes
- Tissue Slicers
- Heaters & Chillers
- SEM Cooling Stage
- Glow Discharge Systems
- Sputter Coaters & Carbon Coaters
- Stages
- Freeze Dryers
- Critical Point Dryers
- Cryo-SEM Preparation System
- Specimen Transfer Systems
- Decontaminators
- Desiccators
- Centrifuges
- Dry Baths
- Stirrers, Hot Plates
- Vortexers & Magnetic Mixers
- Rotators & Rockers
- Ovens & Incubators
- Vibration Isolation
- Air Sampling
- Vacuum Pumps
EMS Technical Data Sheets

Proscope Hand Held Digital Microscope
EMS # 68350
Using ProScope HR Software
Once installed, ProScope HR software basically works like the LCD screen on your digital camera. The main viewscreen displays what the ProScope HR ‘sees’ in real time until you’re ready to capture the image or video. This is called live mode. Images and video can be captured two ways:
| 1. Depressing the large white button on the ProScope HR itself. 2. Click the red capture button on the upper right side of the main window. |
|
|
|
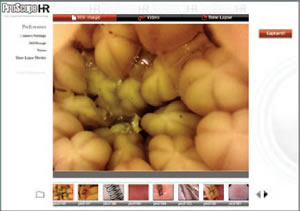
After an image or video clip has been captured, the image can be previewed by clicking the thumbnails below the main window. This is called preview mode. To return to live mode, click the main window.
There are three capture modes in which to shoot your subject:
- Still Image - located at the top-left of the main window. Use this setting when you want to take still images, not video. You can capture images in three resolutions. Click the bar to activate.
- Video - located at the top-center of the main window. Use this setting when you want to record video. You can record video in three resolutions. Click the bar to activate.
- Time Lapse - located at the top-right of the main window. Use this setting when you want to record subjects in time lapse.
You can record
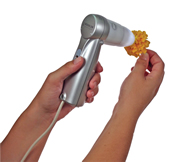
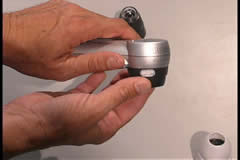
Attaching a lens
 To attach a lens, line up the mark on the side of the base…
 …with the dot on the side of the lens.
 Turn the lens clockwise until it clicks into place.
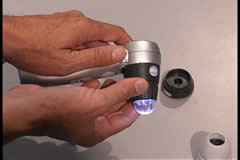
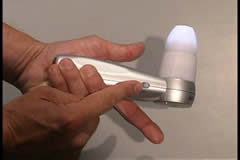 Turn on the lens lighting to make sure the lens is properly attached.
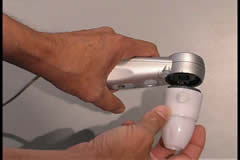
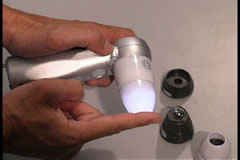
Removing a lens
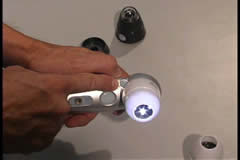 To remove a lens, press and hold the lens release button…
 while turning the lens counter-clockwise until the lens dot and mark on the base line up. Then remove the lens.
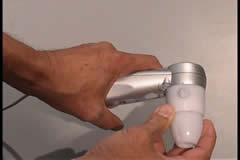
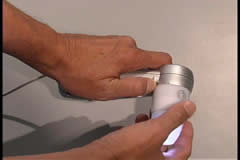
Focusing
 For 30N and 50x lenses, turn the lens cone counter-clockwise until it stops. The lens cone is now fully extended and in touch view
position. Simply touch the object to the end of the lens cone.
 Turning the cone clockwise until it stops will fully retract it. The lens cone is now in distance view position. The focal distance is approx. 1/2-inch from the cone end. Use this mode if you do not want to touch the lens cone to your subject.
 The 1/10x lens only works at a distance and can be adjusted in focus and magnification from 0x to 10x by turning the cone.
 The 100x, 200x and 400x lenses can be adjusted from touch view to distance view by turning the the forward part of the lens cone. Unlike the 30N or 50x lens, there is not an exact cone position for touch or distance view.
 Distance Viewing with Proscope Stand
When using the ProScope HR in distance view position,we recommend the ProScope HR stand — it will keep your ProScope HR steady and at the perfect focal distance.
Online Ordering
ProScope HR is available online from the EMS Catalog. For ordering or product information, click here.
 |
 |
 |
 |
 |
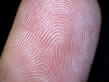
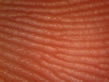
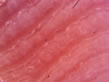
| Finger at 10x | Finger at 50x | Finger at 100x | Finger at 200x | Finger at 400x |